HTML Widget (Legacy)
Overview
The Chat Widget is not customizable beyond the configuration options available in the Widget Builder in dashboard. If you require deeper customization, consider using our UI Kits instead.
HTML / Bootstrap / JQuery
Before getting started
Go through the overview to set up Chat Widget from the CometChat Dashboard.
Once you’ve created a widget, as shown in the image below.
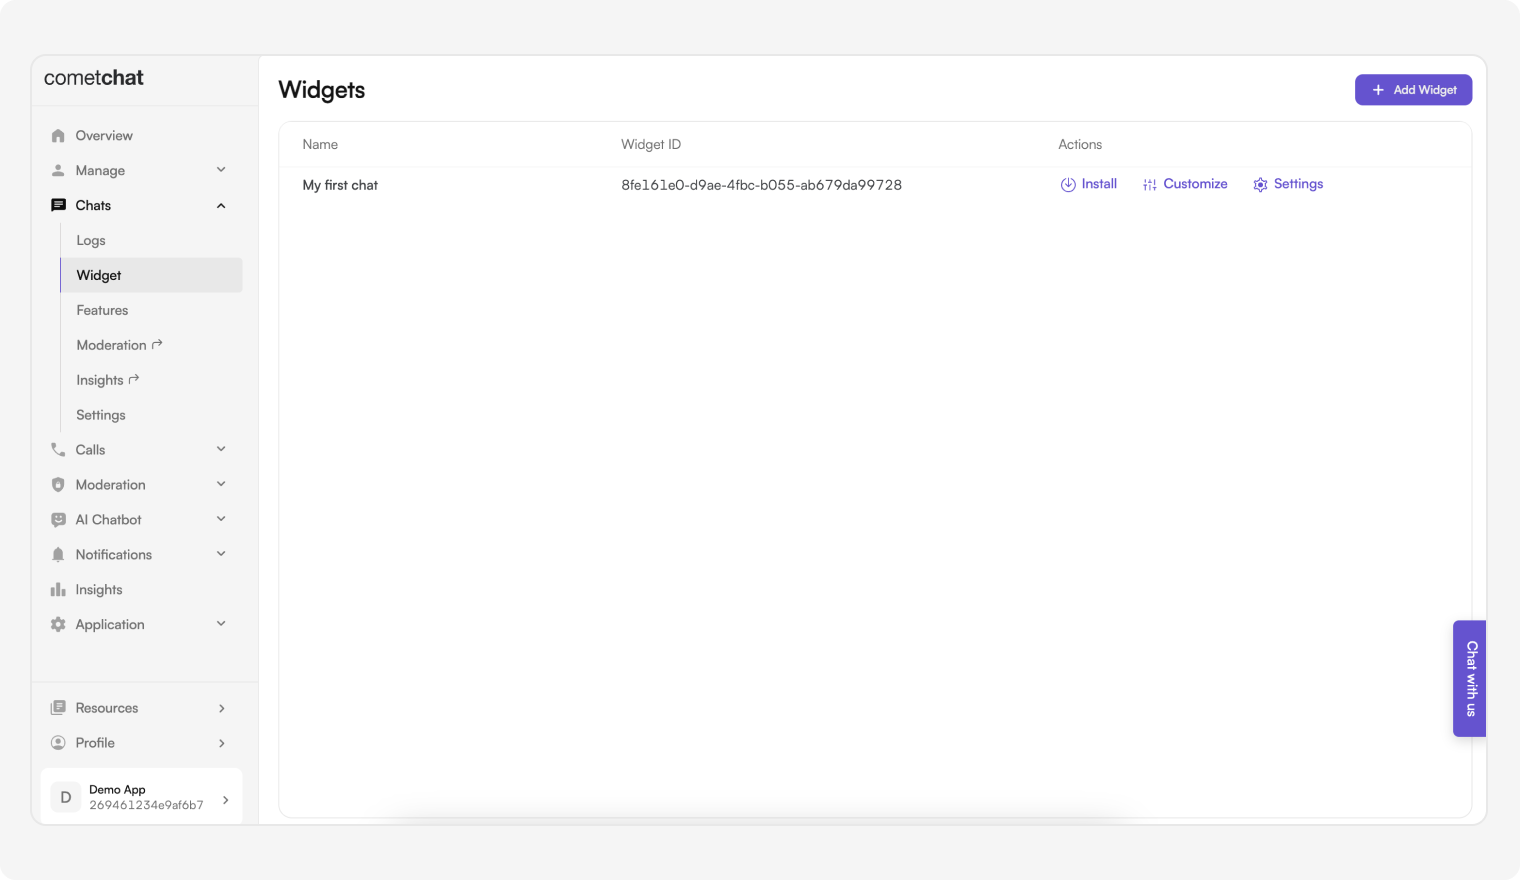
You have an option of loading the Chat Widget in:
- Embedded Layout
- Docked Layout
Security Best Practices
- The Auth Key method is recommended for proof-of-concept (POC) development and early-stage testing.
- For production environments, use an Auth Token instead of an Auth Key to enhance security and prevent unauthorized access. See the Security Measures using Auth Token section below for details.
Embedded Layout
You may simply copy-paste the code below to run the Chat Widget in Embedded Layout.
Replace APP_ID, APP_REGION, AUTH_KEY, WIDGET_ID with your CometChat App ID, Region, Auth Key, and Widget ID in the below code.
Replace UID with the ID of the user you want to login with.
<html>

<head>
  <script
    defer
    src="https://widget-js.cometchat.io/v3/cometchatwidget.js"
  ></script>
</head>

<body>
  <div id="cometchat"></div>
  <script>
  window.addEventListener('DOMContentLoaded', (event) => {
    CometChatWidget.init({
        "appID": "YOUR_APP_ID",
        "appRegion": "YOUR_APP_REGION",
        "authKey": "YOUR_AUTH_KEY"
    }).then(response => {
        console.log("Initialization completed successfully");
        //You can now call login function.
        CometChatWidget.login({
            "uid": "YOUR_UID"
        }).then(response => {
            CometChatWidget.launch({
                "widgetID": "YOUR_WIDGET_ID",
                "target": "#cometchat",
                "roundedCorners": "true",
                "height": "600px",
                "width": "800px",
                "defaultID": 'cometchat-uid-1', //default UID (user) or GUID (group) to show,
                "defaultType": 'user' //user or group
            });
        }, error => {
            console.log("User login failed with error:", error);
            //Check the reason for error and take appropriate action.
        });
    }, error => {
        console.log("Initialization failed with error:", error);
        //Check the reason for error and take appropriate action.
    });
  });
  </script>
</body>

</html>
// Embedded Layout - JavaScript initialization
CometChatWidget.init({
  "appID": "YOUR_APP_ID",
  "appRegion": "YOUR_APP_REGION",
  "authKey": "YOUR_AUTH_KEY"
}).then(response => {
  console.log("Initialization completed successfully");
  CometChatWidget.login({
    "uid": "YOUR_UID"
  }).then(response => {
    CometChatWidget.launch({
      "widgetID": "YOUR_WIDGET_ID",
      "target": "#cometchat",
      "roundedCorners": "true",
      "height": "600px",
      "width": "800px",
      "defaultID": "cometchat-uid-1", //default UID (user) or GUID (group) to show
      "defaultType": "user" //user or group
    });
  }, error => {
    console.log("User login failed with error:", error);
  });
}, error => {
  console.log("Initialization failed with error:", error);
});
To launch an Embedded Widget, pass a configuration object to launch method with the following keys:
| Parameter | Description |
|---|---|
| widgetID | ID of the widget can be accessed from the CometChat dashboard |
| target | ID of the div tag where CometChat Widget will appear |
| roundedCorners | Boolean value that enables/disables rounded corners. |
| height | Height of the widget |
| width | Width of the widget |
| defaultID | To show a default logged in user or group in your chat a.Use UID of a user for one-on-one conversations b.Use GUID for group conversations |
| defaultType | Either user or group depending upon the defaultID |
Docked Layout

You may simply copy-paste the code below to run the Chat Widget in Docked Layout.
Replace APP_ID, APP_REGION, AUTH_KEY, WIDGET_ID with your CometChat App ID, Region, Auth Key, and Widget ID in the below code.
Replace UID with the ID of the user you want to login with.
<html>

<head>
  <script
    defer
    src="https://widget-js.cometchat.io/v3/cometchatwidget.js"
  ></script>
</head>

<body>
  <script>
  window.addEventListener('DOMContentLoaded', (event) => {
    CometChatWidget.init({
        "appID": "YOUR_APP_ID",
        "appRegion": "YOUR_APP_REGION",
        "authKey": "YOUR_AUTH_KEY"
    }).then(response => {
        console.log("Initialization completed successfully");
        //You can now call login function.
        CometChatWidget.login({
            "uid": "YOUR_UID"
        }).then(response => {
            CometChatWidget.launch({
                "widgetID": "YOUR_WIDGET_ID",
                "docked": "true",
                "alignment": "left", //left or right
                "roundedCorners": "true",
                "height": "450px",
                "width": "400px",
                "defaultID": 'cometchat-uid-1', //default UID (user) or GUID (group) to show,
                "defaultType": 'user' //user or group
            });
        }, error => {
            console.log("User login failed with error:", error);
            //Check the reason for error and take appropriate action.
        });
    }, error => {
        console.log("Initialization failed with error:", error);
        //Check the reason for error and take appropriate action.
    });
  });
  </script>
</body>

</html>
// Docked Layout - JavaScript initialization
CometChatWidget.init({
  "appID": "YOUR_APP_ID",
  "appRegion": "YOUR_APP_REGION",
  "authKey": "YOUR_AUTH_KEY"
}).then(response => {
  console.log("Initialization completed successfully");
  CometChatWidget.login({
    "uid": "YOUR_UID"
  }).then(response => {
    CometChatWidget.launch({
      "widgetID": "YOUR_WIDGET_ID",
      "docked": "true",
      "alignment": "left", //left or right
      "roundedCorners": "true",
      "height": "450px",
      "width": "400px",
      "defaultID": "cometchat-uid-1", //default UID (user) or GUID (group) to show
      "defaultType": "user" //user or group
    });
  }, error => {
    console.log("User login failed with error:", error);
  });
}, error => {
  console.log("Initialization failed with error:", error);
});
Please note that the above execution is taking place on DomContentLoaded event fired by the window object. You can break down these steps on different events of your choice to have a more controlled flow of initializing and launching the Chat Widget.
To launch a Docked widget, pass a configuration object to the launch method with the following keys:
| Parameter | Description |
|---|---|
| widgetID | ID of the widget can be accessed from the CometChat dashboard |
| docked | Boolean value to show the enable the docked view |
| alignment | Can be set to left or right |
| roundedCorners | Boolean value that enables/disables rounded corners |
| height | Height of the widget |
| width | Width of the widget |
| defaultID | To show a default logged in user or group in your chat a.Use UID of a user for one - one conversations b.Use GUID for group conversations |
| defaultType | Either user or group depending upon the defaultID |
As mentioned earlier, this launch method can be called multiple times. By modifying the keys in the above configuration object.
Make sure you specify a different and unique target if you intend to launch another instance of Chat Widget.
Advanced Features
Open or close chat window
Chat window of docked layout can be opened/closed using the below method. This method can be triggered on the click event of any element of your webpage.
CometChatWidget.openOrCloseChat(FLAG); //true or false
It takes the following parameters:
| Parameter | Description | Type |
|---|---|---|
| FLAG | Value could be true or false true will open the chat window false will close the chat window. | Required |
Chat with a particular user
This method will open a particular user chat window. This method can be triggered by the click event of any element of your webpage.
CometChatWidget.chatWithUser(UID);
It takes the following parameters:
| Parameter | Description | Type |
|---|---|---|
| UID | The ID of the user you want to chat with | Required |
Chat with a particular group
This method will open a particular group chat window. This method can be triggered by the click event of any element of your webpage.
CometChatWidget.chatWithGroup(GUID);
It takes the following parameters:
| Parameter | Description | Type | |
|---|---|---|---|
| GUID | The ID of the group you want to initiate a call with | Required |
Initiate calls with a particular user
This method will initiate a call with the user. This method can be triggered by the click event of any element of your web page.
CometChatWidget.callUser(UID);
It takes the following parameters:
| Parameter | Description | Type |
|---|---|---|
| UID | The ID of the user you want to initiate a call with. | Required |
Initiate calls with a particular group
This method will initiate a call with the group. This method can be triggered by the click event of any element of your web page.
CometChatWidget.callGroup(GUID);
It takes the following parameters:
| Parameter | Description | Type | |
|---|---|---|---|
| GUID | The ID of the group you want to initiate a call with | Required |
Message Listener
We have provided a callback that is fired every time a message is received. You can use this to show Custom Notifications on your website or perform some other custom action as per your requirement.
CometChatWidget.launch({
// Embedded or Docked layout configuration
}).then(response => {

// OPTIONAL: This is called in the success callback of launch method
CometChatWidget.on("onMessageReceived", (message) => {
console.log("CometChatWidget onMessageReceived", message);
});
});

````

</div></div>

#### Chat open state listener

We have provided a callback that is fired every time the docked layout of the chat widget is in an open state. You can use this to perform some custom action as per your requirement.

<div class="tabs-container"><div class="tabs-header"><button class="tab-button active" onclick="switchTab('tabs-9',0)">JavaScript</button></div><div class="tab-panel active" data-tab-group="tabs-9" data-tab-index="0">
```javascript
CometChatWidget.launch({
// Embedded or Docked layout configuration
}).then(response => {

// OPTIONAL: This is called in the success callback of launch method
CometChatWidget.on("openChat", (args) => {
  console.log("CometChatWidget Chat is open", args);
});
});
````

</div></div>

#### Chat closed state listener

We have provided a callback that is fired every time the docked layout of the chat widget is in a closed state. You can use this to perform some custom action as per your requirement.

<div class="tabs-container"><div class="tabs-header"><button class="tab-button active" onclick="switchTab('tabs-10',0)">JavaScript</button></div><div class="tab-panel active" data-tab-group="tabs-10" data-tab-index="0">
```javascript
CometChatWidget.launch({
// Embedded or Docked layout configuration
}).then(response => {

// OPTIONAL: This is called in the success callback of launch method
CometChatWidget.on("closeChat", (args) => {
console.log("CometChatWidget Chat is closed", args);
});
});

````

</div></div>

#### Click listener

We have provided a callback that is fired every time a user or group is clicked on the sidebar. You can use this to perform some custom action as per your requirement.

<div class="tabs-container"><div class="tabs-header"><button class="tab-button active" onclick="switchTab('tabs-11',0)">JavaScript</button></div><div class="tab-panel active" data-tab-group="tabs-11" data-tab-index="0">
```javascript
CometChatWidget.launch({
// Embedded or Docked layout configuration
}).then(response => {

// OPTIONAL: This is called in the success callback of launch method
CometChatWidget.on("onItemClick", (args) => {
  console.log("CometChatWidget user/group is clicked", args);
});
});
````

</div></div>

#### Localization

With language localization, our Chat Widget adapts to the language of a specific country or region. Chat Widget allows you to detect the language of your users based on their browser settings and set the language of the widget accordingly. Currently, we support the following 12 languages for localization:

- English (en, en-US, en-GB)
- Chinese (zh, zh-TW)
- Spanish (es)
- Hindi (hi)
- Russian (ru)
- Arabic (ar)
- Portuguese (pt)
- Malay (ms)
- French (fr)
- German (de)
- Swedish (sv)
- Lithuanian (lt)
- Hungarian (hu)

<div class="tabs-container"><div class="tabs-header"><button class="tab-button active" onclick="switchTab('tabs-12',0)">JavaScript</button></div><div class="tab-panel active" data-tab-group="tabs-12" data-tab-index="0">
```javascript
CometChatWidget.localize(LANGUAGE_CODE);
It takes the following parameters:
| Parameter | Description | Type |
|---|---|---|
| LANGUAGE_CODE | The language code the texts to be translated into | Required |
User/Group Management
Create a user on-the-fly
This saves you the hassle of creating users beforehand from the CometChat Pro Dashboard. In order to create a user on-the-fly, you can call the createOrUpdateUser() method on the CometChatWidget class.
It might happen that the user already exists. In that case, this method updates the user details. It can be used to change the user's name on-the-fly.
The method is as follows:
CometChatWidget.init({
appID: 'YOUR_APP_ID',
appRegion: 'YOUR_APP_REGION',
authKey: 'YOUR_AUTH_KEY',
}).then((response) => {

/\*\*

- Create user once initialization is successful
  \*/
  const user = new CometChatWidget.CometChat.User(UID);
  user.setName(NAME);
  user.setAvatar(AVATAR_URL);
  user.setLink(PROFILE_LINK);
  CometChatWidget.createOrUpdateUser(user).then((user) => {

// Proceed with user login
CometChatWidget.login({
uid: UID,
}).then((loggedInUser) => {

    // Proceed with launching your Chat Widget
    CometChatWidget.launch({
      // Embedded or docked layout configuration
    })

});
});
});

````

</div></div>

It takes a configuration object with the following keys:

| Parameter     | Description                                 | Type     |
| ------------- | ------------------------------------------- | -------- |
| UID           | The ID of the user to be created and log in | Required |
| NAME          | The username associated with the user       | Required |
| AVATAR_URL    | URL to profile picture of the user          | Optional |
| PROFILE_LINK  | URL to profile page                         | Optional |

##### Create a group on-the-fly

This saves you the hassle of creating groups beforehand from the CometChat Pro Dashboard. In order to create a group on-the-fly, you can call the `createOrUpdateGroup()` method on the CometChatWidget class.

It might happen that the group already exists. In that case, this method updates the group details. It can be used to change the group's name and type on the fly.

<div class="tabs-container"><div class="tabs-header"><button class="tab-button active" onclick="switchTab('tabs-14',0)">JavaScript</button></div><div class="tab-panel active" data-tab-group="tabs-14" data-tab-index="0">
```javascript
CometChatWidget.init({
appID: 'YOUR_APP_ID',
appRegion: 'YOUR_APP_REGION',
authKey: 'YOUR_AUTH_KEY',
}).then((response) => {
CometChatWidget.login({
  uid: "YOUR_UID",
}).then((loggedInUser) => {
  /**
   * Create group once your user has logged in.
   */
  const group = new CometChatWidget.CometChat.Group(GUID, GROUP_NAME, GROUP_TYPE, PASSWORD);
  group.setIcon(ICON_URL);
  CometChatWidget.createOrUpdateGroup(group).then(group => {
    // Proceed with launch
    CometChatWidget.launch({
      // Embedded or docked layout configuration
    })
  });
});
});
````

</div></div>

It takes a configuration object with the following keys:

| Parameter   | Description                                                                                           | Type     |
| ----------- | ----------------------------------------------------------------------------------------------------- | -------- |
| GUID        | The group will be created with the mentioned ID                                                       | Required |
| GROUP_NAME  | The name associated with the group being created                                                      | Required |
| GROUP_TYPE  | The type of group that you want to create. Type of the group can be: 1. Public 2. Password 3. Private | Required |
| PASSWORD    | The group password when groupType is set to 'Password'                                                | Required |
| ICON_URL    | An URL to group icon                                                                                  | Optional |

#### User Logout

When your user logs out from the website, you can also log out the user from Chat Widget by calling the `logout()` method of the `CometChatWidget` class.

<div class="tabs-container"><div class="tabs-header"><button class="tab-button active" onclick="switchTab('tabs-15',0)">JavaScript</button></div><div class="tab-panel active" data-tab-group="tabs-15" data-tab-index="0">
```javascript
CometChatWidget.logout().then(response => {
  // User successfully logged out.
// Perform any clean up if required.
});
Security Measures using Auth Token
If you wish to manage the Auth Key and generate Auth Token from your server application. We recommended you follow the below steps.
Please open this document - https://api-explorer.cometchat.com/reference/chat-apis and refer to this Post API call (https://api-explorer.cometchat.com/reference/create-authtoken) to create users and generate Auth token
You may then use the generated Auth Token and pass it to the login method below to log in to the user
The below code can be copy-pasted to launch your chat widget using Auth Token
Replace APP_ID, APP_REGION, AUTH_TOKEN, WIDGET_ID with your CometChat App ID, Region, Auth Token, and Widget ID in the below code.
Replace UID with the ID of the user you want to login with.
<html>
<head>
  <script defer src="https://widget-js.cometchat.io/v3/cometchatwidget.js"></script>
</head>
<body>
  <div id="cometchat"></div>
  <script>
  window.addEventListener('DOMContentLoaded', (event) => {
      CometChatWidget.init({
          "appID": "YOUR_APP_ID",
          "appRegion": "YOUR_APP_REGION",
      }).then(response => {
          console.log("Initialization completed successfully");
          //You can now call login function.
          CometChatWidget.login({
              "authToken": "YOUR_AUTH_TOKEN"
          }).then(response => {
              CometChatWidget.launch({
                  "widgetID": "YOUR_WIDGET_ID",
                  "target": "#cometchat",
                  "roundedCorners": "true",
                  "height": "600px",
                  "width": "800px",
                  "defaultID": 'cometchat-uid-1', //default UID (user) or GUID (group) to show,
                  "defaultType": 'user' //user or group
              });
          }, error => {
              console.log("User login failed with error:", error);
              //Check the reason for error and take appropriate action.
          });
      }, error => {
          console.log("Initialization failed with error:", error);
          //Check the reason for error and take appropriate action.
      });
  });
  </script>
</body>
</html>
<html>

<head>
  <script
    defer
    src="https://widget-js.cometchat.io/v3/cometchatwidget.js"
  ></script>
</head>

<body>
  <div id="cometchat"></div>
  <script>
  window.addEventListener('DOMContentLoaded', (event) => {
      CometChatWidget.init({
          "appID": "YOUR_APP_ID",
          "appRegion": "YOUR_APP_REGION",
      }).then(response => {
          console.log("Initialization completed successfully");
          //You can now call login function.
          CometChatWidget.login({
              "authToken": "YOUR_AUTH_TOKEN"
          }).then(response => {
              CometChatWidget.launch({
                  "widgetID": "YOUR_WIDGET_ID",
                  "docked": "true",
                  "roundedCorners": "true",
                  "height": "600px",
                  "width": "800px",
                  "defaultID": 'cometchat-uid-1', //default UID (user) or GUID (group) to show,
                  "defaultType": 'user' //user or group
              });
          }, error => {
              console.log("User login failed with error:", error);
              //Check the reason for error and take appropriate action.
          });
      }, error => {
          console.log("Initialization failed with error:", error);
          //Check the reason for error and take appropriate action.
      });
  });
  </script>
</body>

</html>
To launch an embedded/docked widget, pass a configuration object to the launch method with the following keys:
| Parameter | Description |
|---|---|
| widgetID | ID of the widget can be accessed from the CometChat dashboard |
| target | For embedded layout, pass the ID of the div tag where CometChat Widget will appear ID of the div tag where CometChat Widget will appear |
| docked | For docked layout, use the docked parameter as a boolean value to show the enable the docked view |
| roundedCorners | Boolean value that enables/disables rounded corners. |
| height | Height of the widget |
| width | Width of the widget |
| defaultID | To show a default logged in user or group in your chat a.Use UID of a user for one - one conversations b.Use GUID for group conversations |
| defaultType | Either user or group depending upon the defaultID |
Custom Build
Deploy a custom build of the chat widget on your own server.
Installation steps
- Clone the repository
git clone https://github.com/cometchat-pro/web-chat-widget-custom
- Navigate to the project directory and set your CDN URL in
CONSTS.js
cd CometChatWorkspace
// EG: If URL is set as https://your_domain.com/widget
// cometchatwidget.js will be available at https://your_domain.com/widget/cometchatwidget.js
module.exports = {
  URL: "https://your_domain.com/widget",
}
- Install dependencies
npm install
- Build the custom widget
npm run build:custom
- Copy the contents of the
builddirectory to your website’s source.
Usage
Update the widget CDN link in your installation code. It should match the URL you configured in CONSTS.js.
<html>

<head>
  <script defer src="https://your_domain.com/widget/cometchatwidget.js"></script>
</head>

<body>
  <div id="cometchat"></div>
  <script>
  window.addEventListener('DOMContentLoaded', (event) => {
      CometChatWidget.init({
          "appID": "APP_ID",
          "appRegion": "APP_REGION",
          "authKey": "AUTH_KEY"
      }).then(response => {
          console.log("Initialization completed successfully");
          //You can now call login function.
          CometChatWidget.login({
              "uid": "UID"
          }).then(response => {
              CometChatWidget.launch({
                  "widgetID": "WIDGET_ID",
                  "target": "#cometchat",
                  "roundedCorners": "true",
                  "height": "600px",
                  "width": "800px",
                  "defaultID": 'cometchat-uid-1', //default UID (user) or GUID (group) to show,
                  "defaultType": 'user' //user or group
              });
          }, error => {
              console.log("User login failed with error:", error);
              //Check the reason for error and take appropriate action.
          });
      }, error => {
          console.log("Initialization failed with error:", error);
          //Check the reason for error and take appropriate action.
      });
  });
  </script>
</body>

</html>
<html>

<head>
  <script defer src="https://your_domain.com/widget/cometchatwidget.js"></script>
</head>

<body>
  <script>
  window.addEventListener('DOMContentLoaded', (event) => {
      CometChatWidget.init({
          "appID": "APP_ID",
          "appRegion": "APP_REGION",
          "authKey": "AUTH_KEY"
      }).then(response => {
          console.log("Initialization completed successfully");
          //You can now call login function.
          CometChatWidget.login({
              "uid": "UID"
          }).then(response => {
              CometChatWidget.launch({
                  "widgetID": "WIDGET_ID",
                  "docked": "true",
                  "alignment": "left", //left or right
                  "roundedCorners": "true",
                  "height": "450px",
                  "width": "400px",
                  "defaultID": 'cometchat-uid-1', //default UID (user) or GUID (group) to show,
                  "defaultType": 'user' //user or group
              });
          }, error => {
              console.log("User login failed with error:", error);
              //Check the reason for error and take appropriate action.
          });
      }, error => {
          console.log("Initialization failed with error:", error);
          //Check the reason for error and take appropriate action.
      });
  });
  </script>
</body>

</html>